| Condition | New | Core Components | Laser Source |
| Usage | Weld Metal | Max. Output Power | 2000W |
| Applicable Material | Metal | Cnc Or Not | Yes |
| Cooling Mode | Water Cooling | Control Software | Ruida/Qilin |
| Pulse Width | 50-30000Hz | Laser Power | 1000w/ 1500w/ 2000w |
| Weight (Kg) | 300 Kg | Certification | Ce, Iso9001 |
| Core Components | Fiber Laser Source, Fiber, Handle Laser Welding Head | Key Selling Points | High-Accuracy |
| Function | Metal Part Laser Welding | Fiber Length | ≥10m |
| Applicable Industries | Hotels, Garment Shops, Building Material Shops | Core Components | Laser Supply |
| Mode Of Operation | Pulsed | After Warranty Service | Online Support |
| Focal Spot Diameter | 50μm | Wavelength | 1080 ±3nm |
| Video Outgoing Inspection | Provided | Graphic Format Supported | Ai, Plt, Dxf, Dwg, Dxp |
| Place Of Origin | Jinan,Shandong Province | Warranty Time | 3 Years |
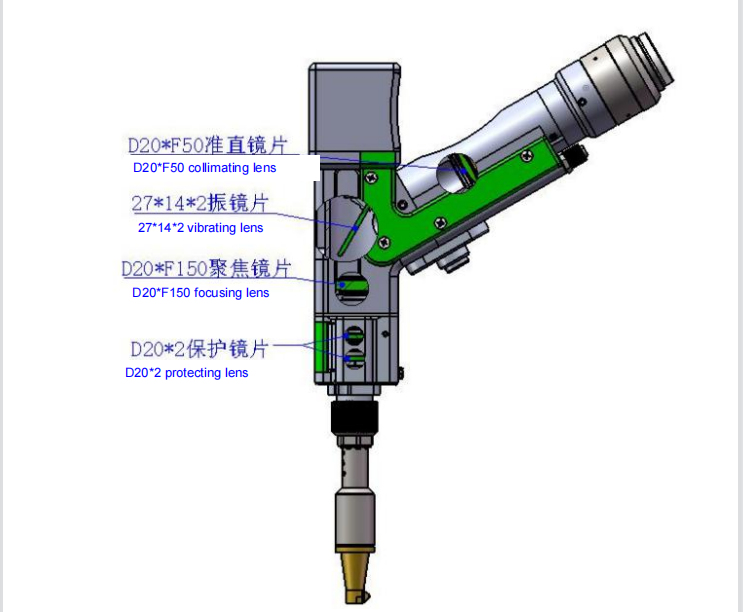
- Fiber laser lens :
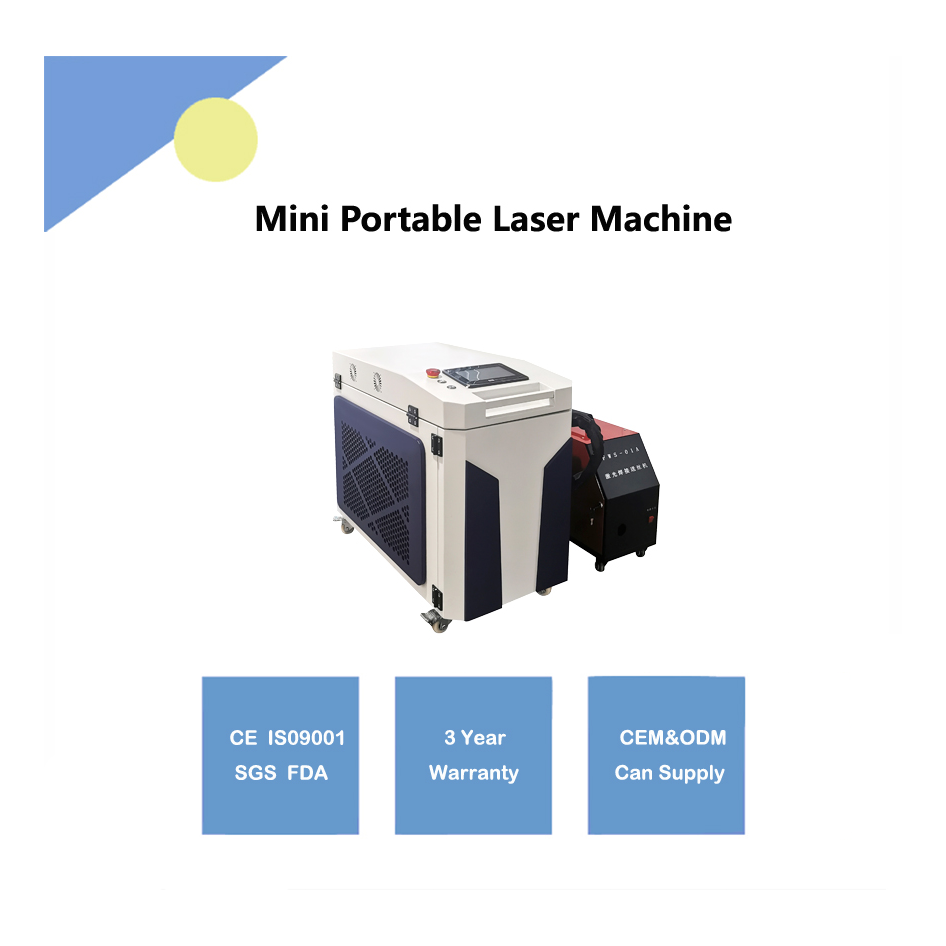
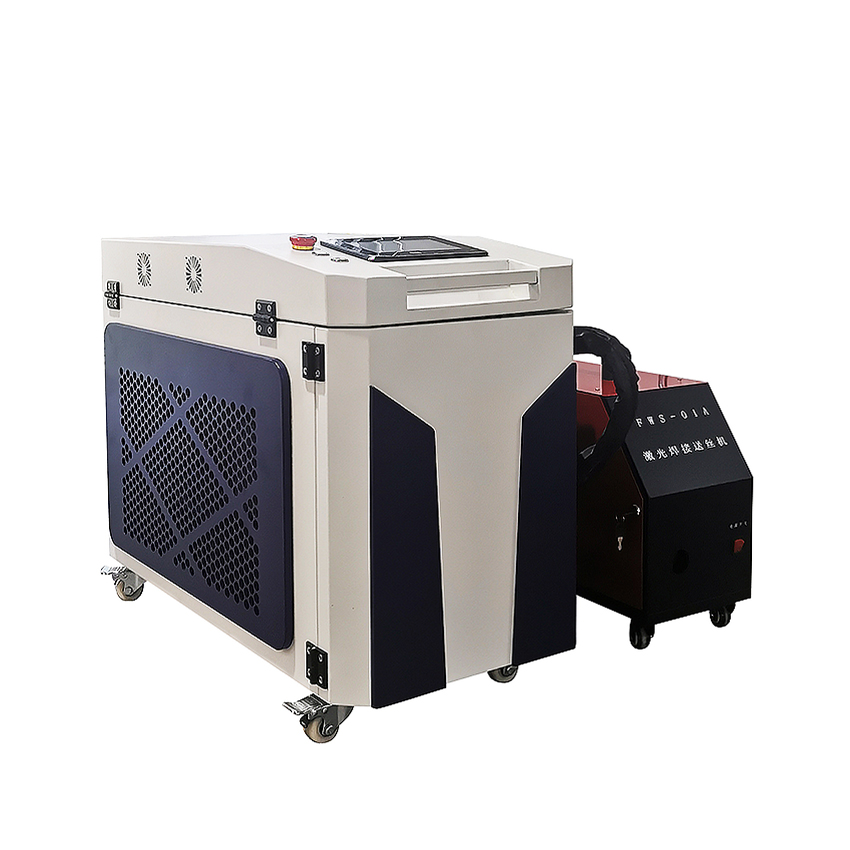 The three-in-one laser welding and cleaning machine can cut, weld and clean metals without purchasing multiple laser equipment separately. It is suitable for welding stainless steel and aluminum alloys, and can also weld carbon steel, titanium alloys, etc., and can also be used for welding. Rust removal and hand-held metal cutting. For cleaning of metal rust, paint, oil and coatings, saving cost and space. It can weld a variety of metal plates and pipes, mainly suitable for welding stainless steel, gold, silver, copper, galvanized sheet, aluminum sheet, various alloy sheets, rare metals and other materials. Copper alloy surface patina cleaning, steel pipe surface oxide and pollutant cleaning, rail derusting. Widely used in advertising signs, hardware products, auto parts, craft gifts and other industries, can be used for welding carbon steel, stainless steel, titanium, aluminum and other metal materials.1.Product Structure2.Pipe connection
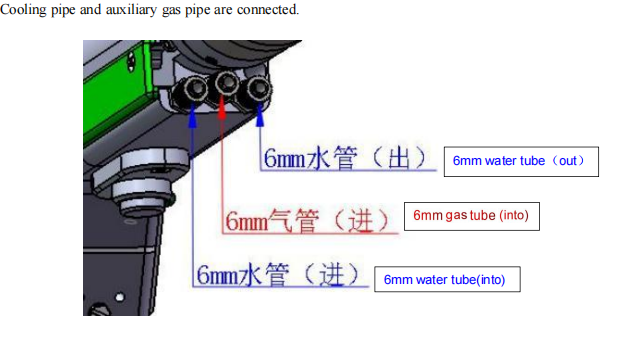 3.Fiber input installation
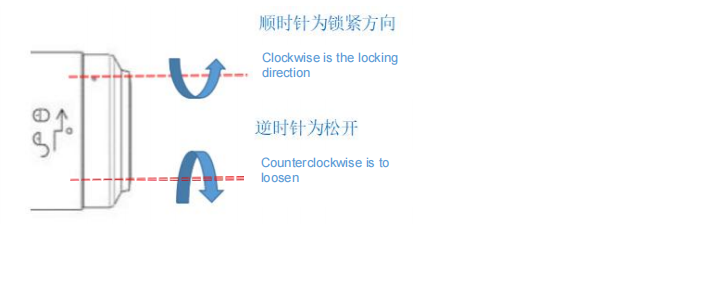
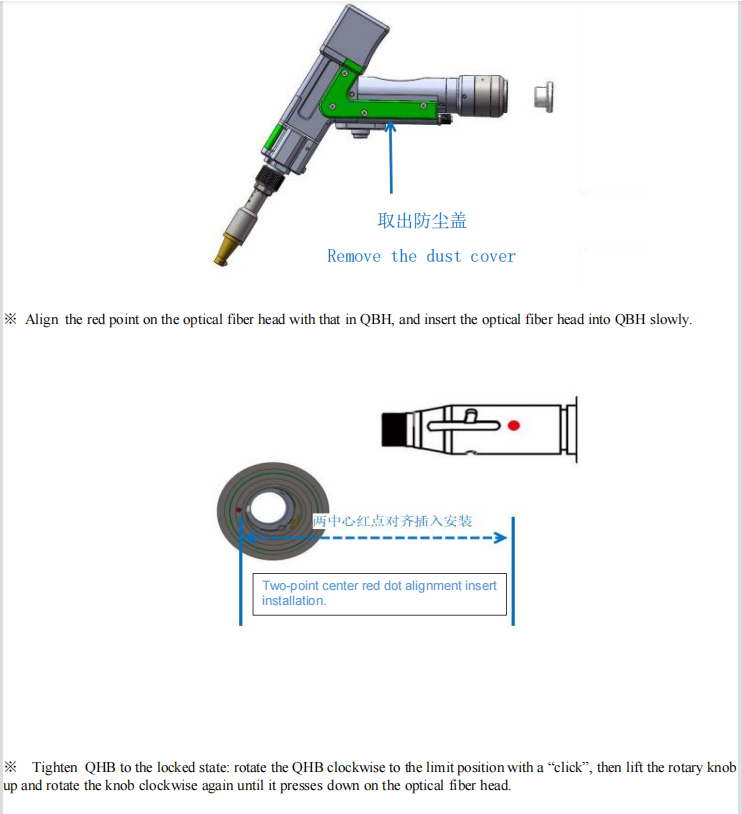
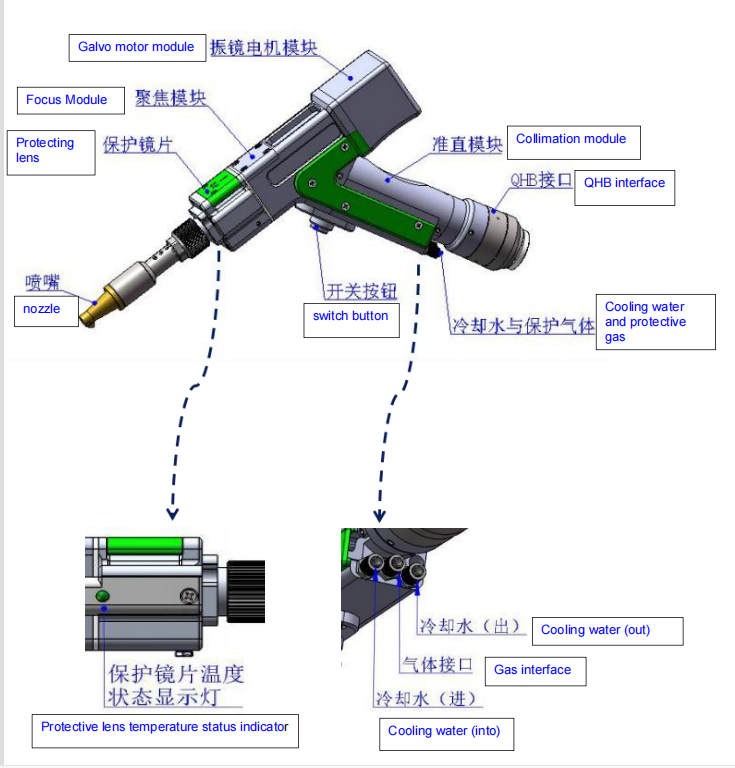
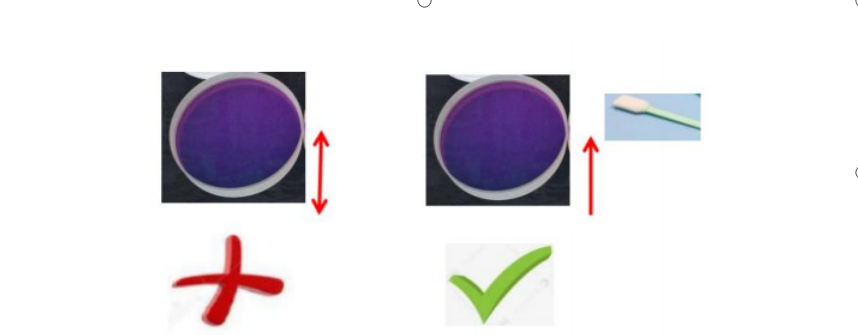 Disassembly of focusing lens: Tool: 2mm inner hexagon wrench, clean cotton swab, alcohol and masking tape The assembly and disassembly of lens should be operated with hands wearing dust-free gloves or fingertips in clean environment. Steps Step 1: loosen M4 screw with a 2mm inner hexagon wrench. Step 2: pull out ofthe focusing module horizontally Step 3: seal the port with masking tape to stop dust from entering the cavity to cause contamination. Step 4: the cover is gently pressed down and rotated 90°.Align the two convex places with the left and right openings. Take out the cover upward and the protective lens can be changed. (Note: install lens in concave and convex direction.)
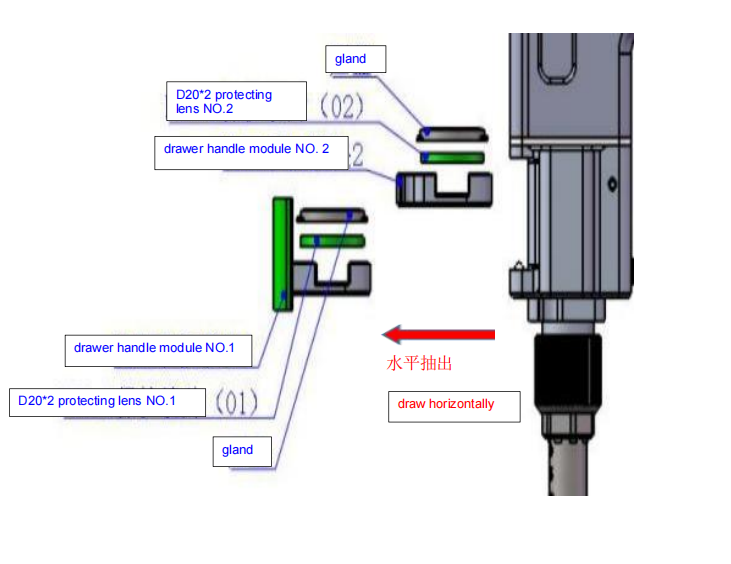
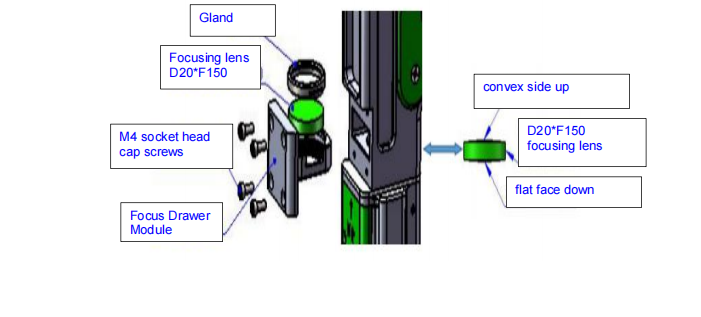 Disassembly of protective lens The assembly and disassembly of lens hould be operated with hands wearing dust-free gloves or fingertips in clean environment. Steps: Change protective glass 01: Step 1: hold both sides of the green drawer handle module 1 in hand and pull out the protective lens horizontally. Take care ofthe dust, seal the port exposed on cavity with masking tape to stop the entry of dust into the cavity and replace the protective glass. Step 2: the cover is gently pressed down and rotated 90°. Loosen it when the two sides align with the two notches. Take out the cover and change the protective lens. Change protective glass 02: Step 1: take out the green drawer handle module 1 and pull out the protective lens horizontally. Take care of the dust, seal the port exposed on cavity with masking tape to stop the entry of dust into the cavity and replace the protective glass. Step 2: the cover is gently pressed down and rotated 90°. Loosen it when the two sides align with the two notches. Take out the cover and change the protective lens.